How to make a racoon with colored paper

How to make a racoon with colored paper
What do you need :
- Thick craft paper or card stock in shades of brown, beige, black and white
- Scissors
- Glue Stick
- Marker
- Pencil

Step 1
Download the template and print it out. Cut out the various pieces. The template contains the racoon’s body, head, fur, tail, face, eyes, nose and feet.

Step 2
Trace out the various parts of the racoon on craft paper in the appropriate colors. Here we’ve gone with light brown for the head, body and tail, dark brown for the eyes and feet, black for the nose, white for the face and beige for the fur.

Step 3
Start with assembling the basics. Stick the face on the head and the fur on the body. At the same time, you can use the marker to draw thick stripes on the tail.

Step 4
First the head. Glue the eyes and nose on the face in the right places. Use the marker to draw on eyelids, a mouth and add some shading to the ears.

Step 5
Moving on to the body assembly, stick the tail behind the body and the feet under it.

Step 6
Stick the head on the body and you’re done!

How to draw a Yak tutorial

How to make an Easter candle

Papercraft Tortoise step-by-step

How to draw a grass snake tutorial
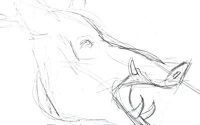
Wild Boar head drawing tutorial