How to make paper bag leprechaun gnome
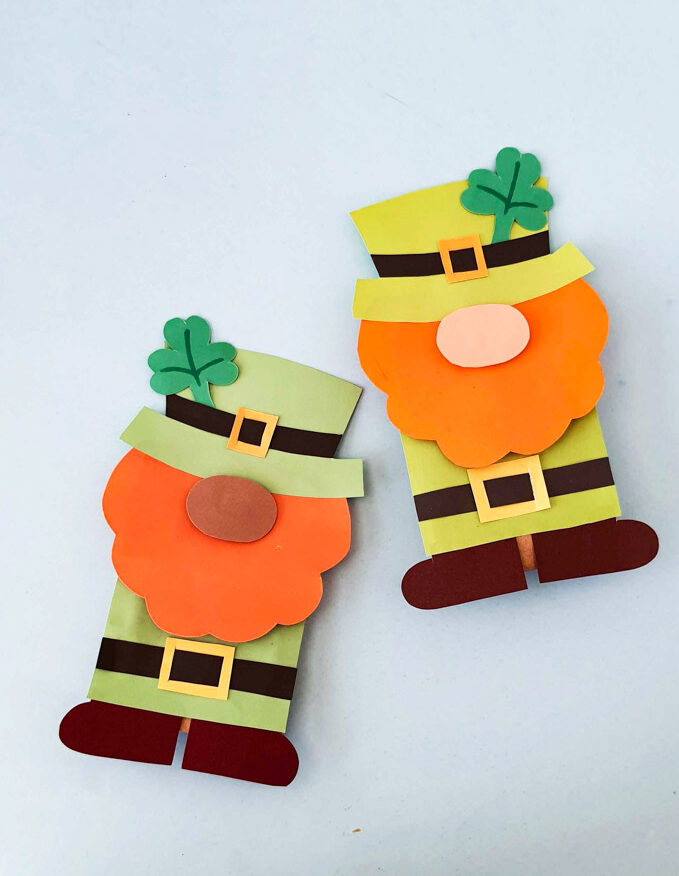
How to make paper bag leprechaun gnome
What do you need:
- Paper bag
- Colored craft papers
- Double-sided foam tape
- Marker
- Pencil
- Scissors
- Glue

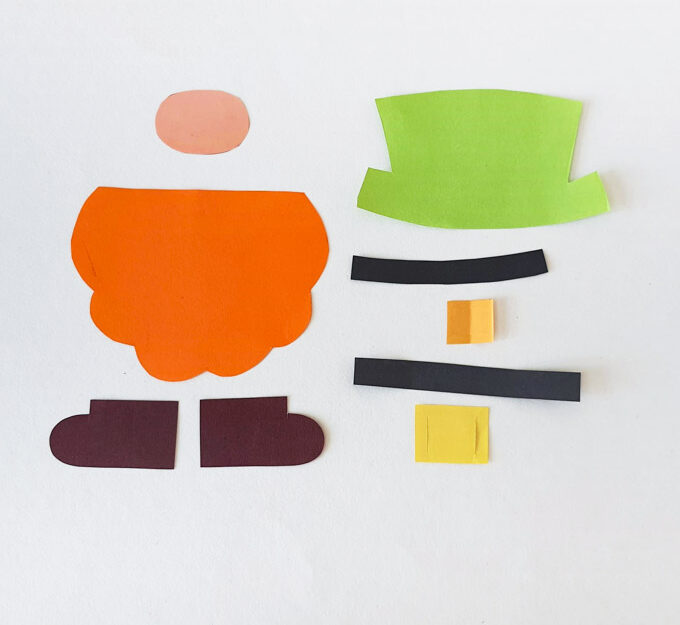
Step 1
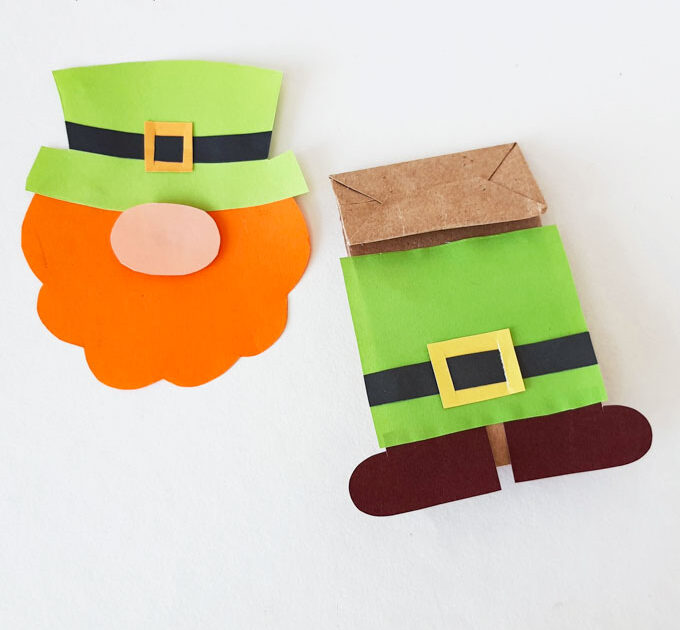
Draw the pieces on craft paper and cut them out. Of course, the leprechaun will be dressed in green, although some leprechauns are also found in red. You can go for orange and brown for the beard and shoes respectively. Use yellow for the buckles and black for the belts.
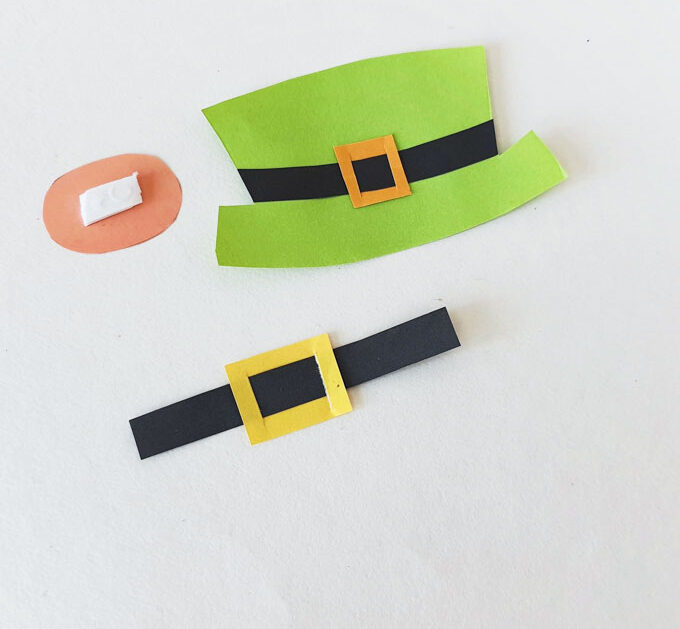
Step 2
Make slits in the buckles and slide the black strips through them. Cut out a small piece of double-sided foam tape and stick it on the nose.

Step 3
Let’s use that smaller belt we made in the previous step and attach it to the leprechaun’s hat.
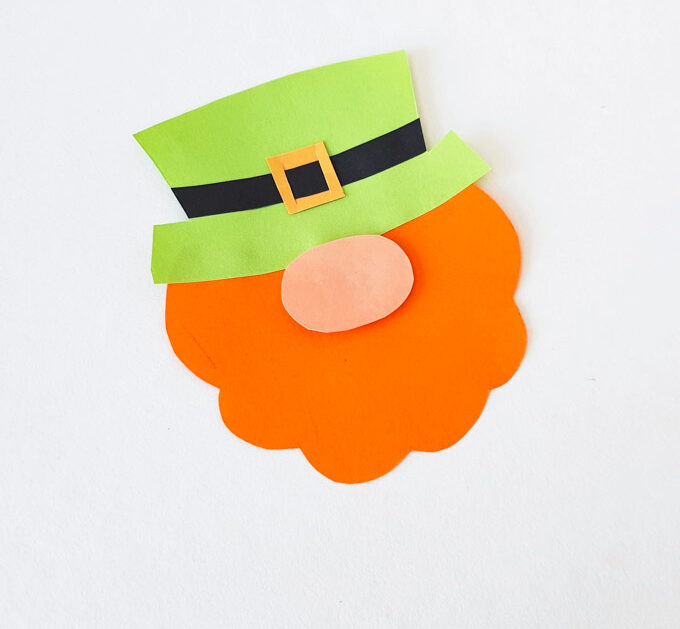
Step 4
Now let’s move on to the orange hair/beard piece – it serves both purposes in this paper bag leprechaun gnome craft! Stick the hat to the top of the piece. Remove the backing from the double-sided foam on the nose and stick it right below the hat.
Step 5
Now, get the body of the leprechaun and attach the shoes to the bottom.

Step 6
Stick the belt you made earlier on the green rectangle, towards the bottom.

Step 7
Stick the leprechaun’s body on the paper bag, so that the bottom of the bag is covered.
Step 8
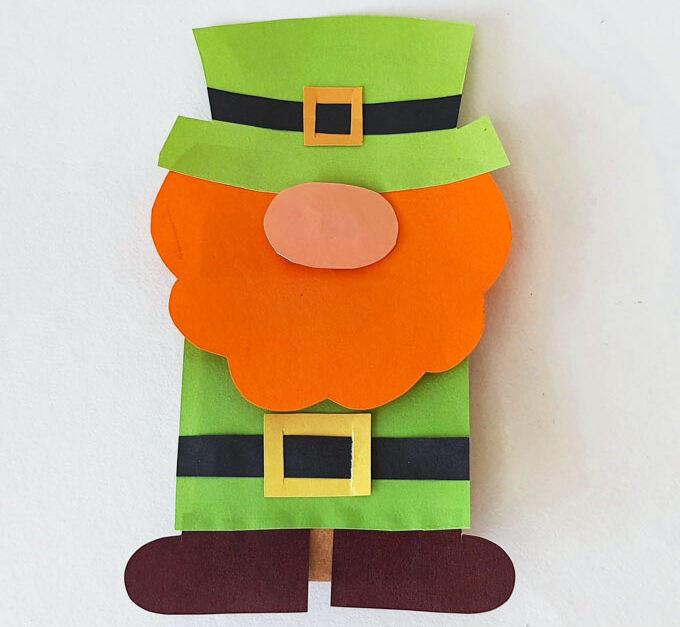
Now stick the leprechaun’s head on the folded flap of the paper bag. Insert the little shamrock into the belt strap of the hat.

How to make Christmas trees from pinecones for decoration

How to make a Christmas wreath out of twigs

How to make a picture of sea stones in a photo frame

How to make a clay candle holder

How to make a decorative Christmas tree
