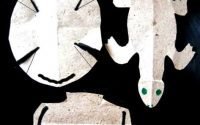
How to make a paper crocodile model

How to make a toy paper crocodile model.
The other day I had to hold a master class for making cardboard animal toys. I decided that it would be interesting for children to make, for example, a crocodile. It is clear that I myself had to invent a model. At first intuitively at random, I made such a crocodile:
It seems to be a good toy. Now I will repeat in stages what I did for the first time at random. I want to say that this is not origami and the size and appearance of the parts can be changed as desired.
I fold a long strip of cardboard along and draw a contour.

I cut along the lines decorating the tail with zigzags:

I cut teeth in jaw too:

I cut out the eyes and the nose pad from pieces of paper.

I bend over and glue details with eyes.

I stick a green overlay on top.

How nice!
But our crocodile still needs a lower jaw to chew.


I very precisely stick his jaw exactly in the middle so that the crocodile does not turn out with crooked mouth.

And now the paper crocodile head is ready:

Then I take a long strip of green paper, fold it in four and draw a “leg” with claws:

I cut and bending these legs again in a zigzag:

By gluing the legs correctly, I get a lovely paper crocodile:

This crocodile is very good, but it is long and difficult to make, if you want a simpler model, then here is an easy lesson on DIY crocodile.


