How to make a fairy out of paper
How to make a fairy out of paper
What do you need:
- Craft paper in different colors
- Colored markers
- Scissors
- Glue stick
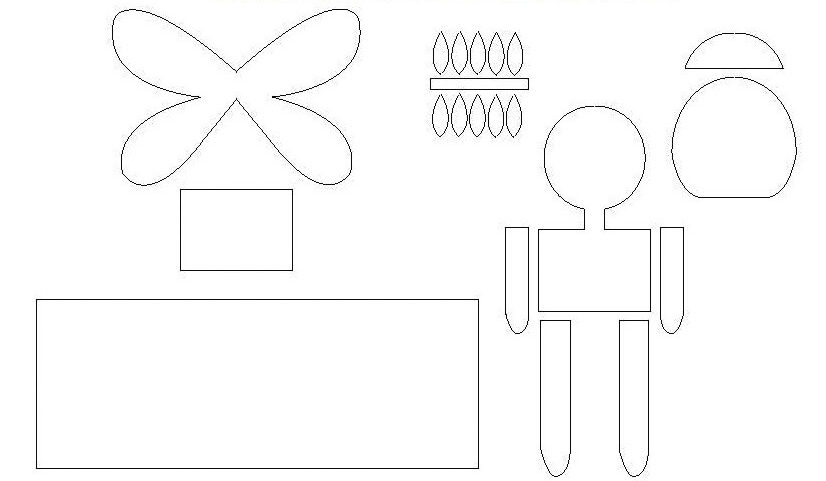
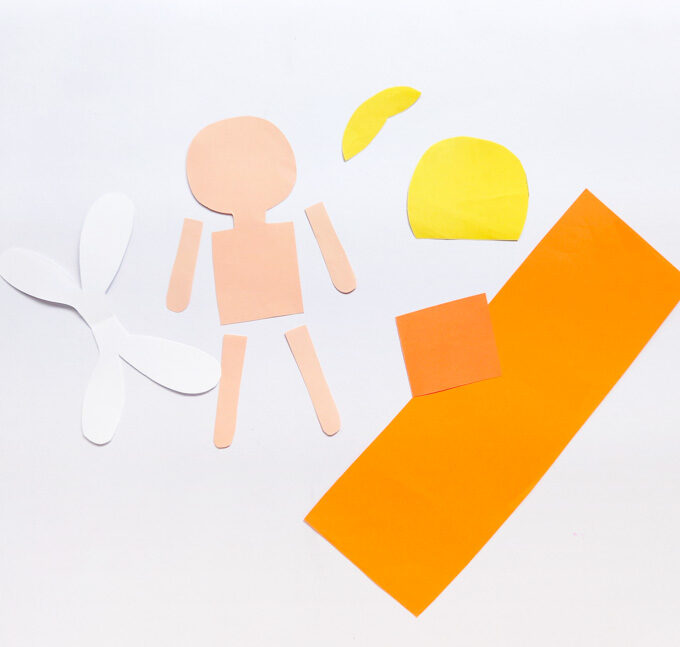
Step 1
Trace the parts of the template onto craft paper of the appropriate colors and cut them out. You can use paper in any skin tone color for the torso and limbs. Go with blonde, black or any color for the hair. Keep the wings white and go crazy with the dress – choose any color you like!
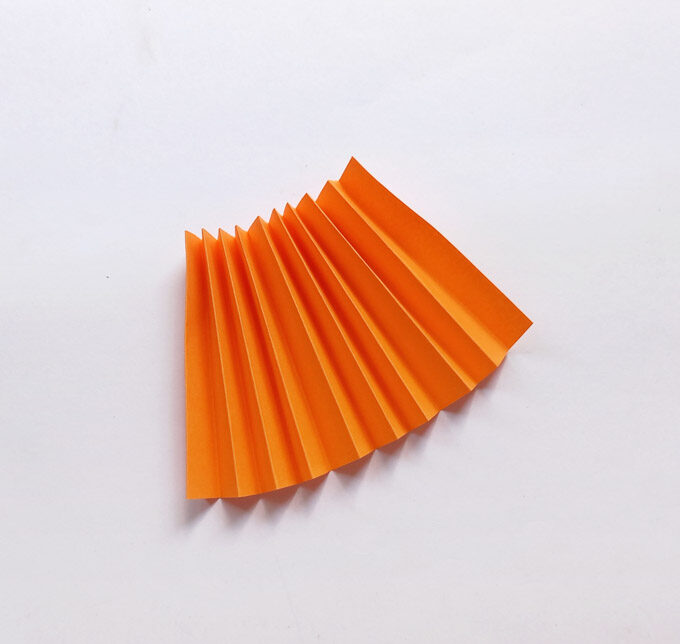
Step 2
Let’s start by getting the dress ready. Pick up the long rectangle for the skirt portion, and fold it in accordion style to create a ‘pleated’ effect as shown below.
Step 3
Keep the dress away for now. Time to fix the hair now! Stick the fringe or front part of the hair on the head portion.
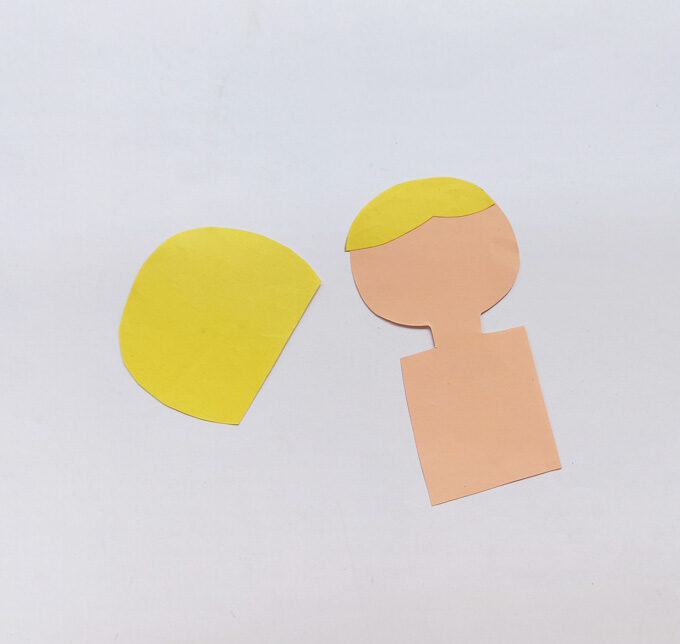
Step 4
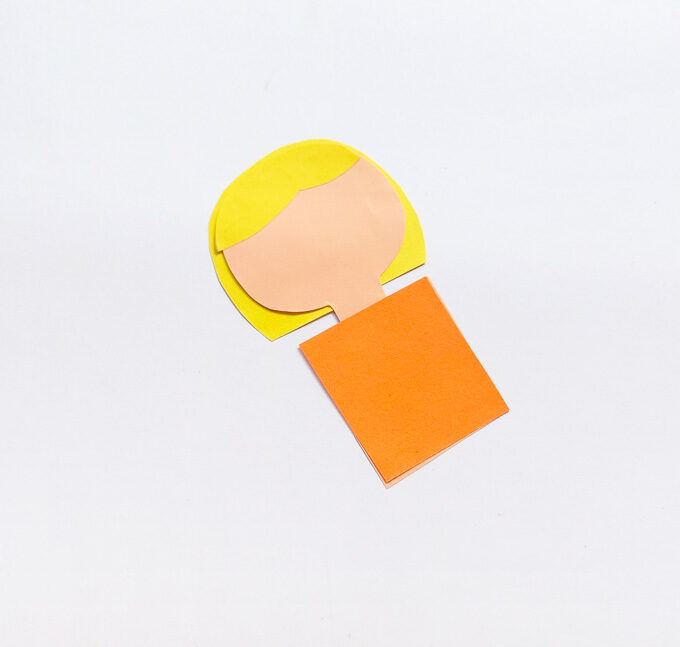
Now stick the larger hair piece behind the head, so it appears from around the sides of the head. Stick the small rectangle of the dress on the torso part.
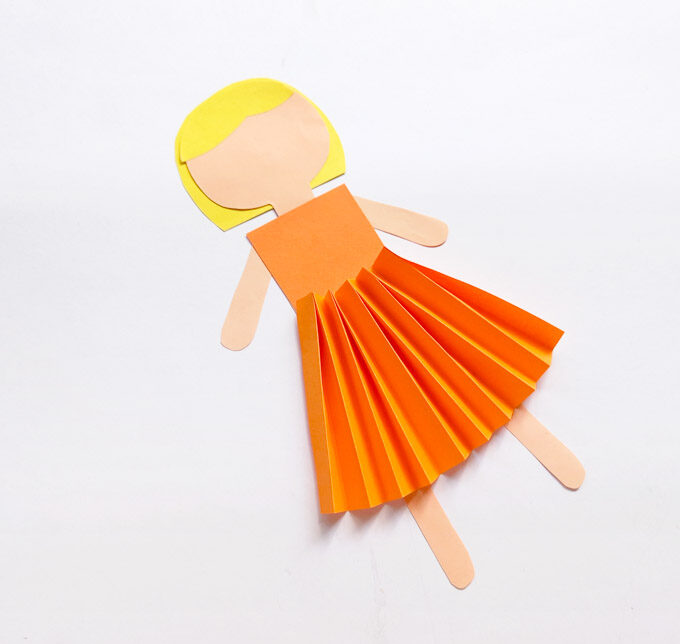
Step 5
Let’s finish dressing our paper fairy craft! Stick the pleated skirt on the base of the small rectangle. Now stick the arms and legs in the appropriate positions, applying glue behind the body.
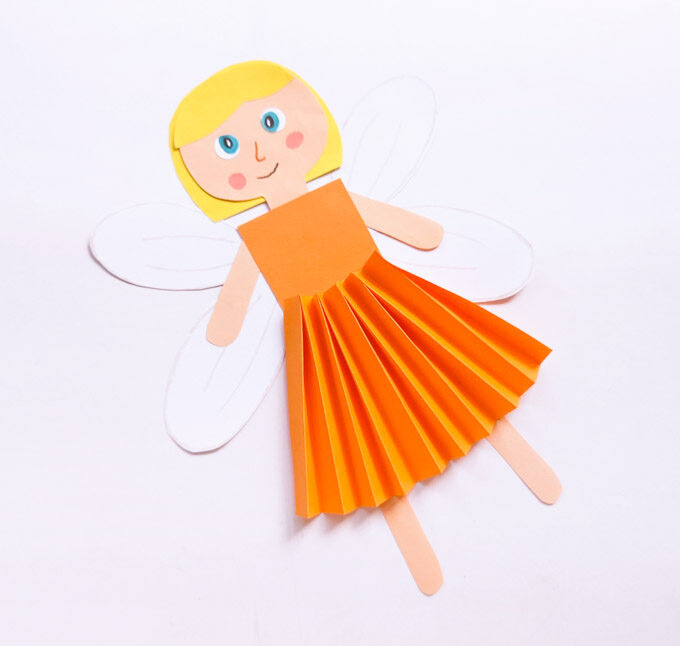
Step 6
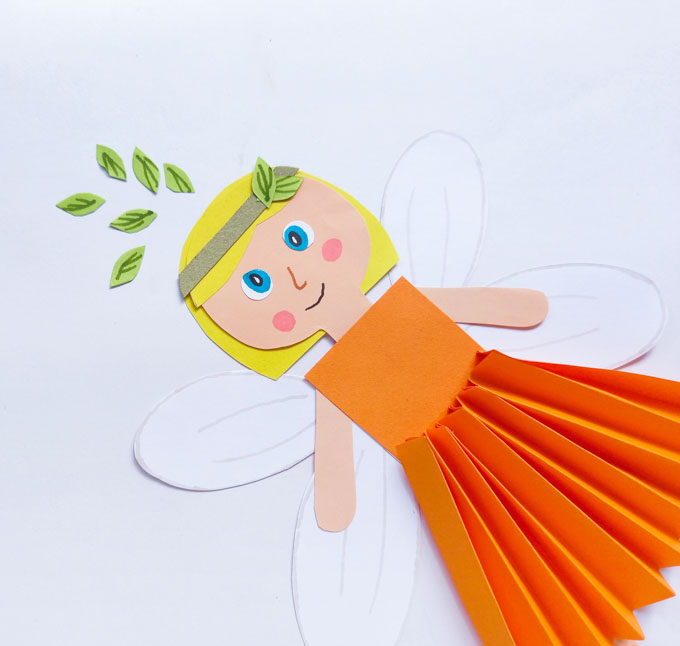
Time to make our plain girl into a fairy – by attaching some wings! Stick the wings to the back of the body, ensuring it is placed in the center so the wings appear symmetrical when looking from the front.Time to add some finishing touches on our paper fairy craft! Use colored markers to add eyes, nose, cheeks and a smile on the fairy’s face.
Step 7
You can leave the paper fairy craft as it is, but if you want to dress it up further, you can add a band on the head, and then stick on some leaves to make a wreath.

How to make an paper octopus bookmark

How to make an original “Magic” lamp

How to make a handprint ladybug with colored paper

How to make a wreath of sea shells

How to make a beautiful vase out of plaster
