How to draw a chameleon step by step

Let`s learn how to draw a chameleon.
You can talk for a long time about the life and character of chameleon, but now it’s not our problem. In short: it’s such a lizard that can change the color of its body (not just masking, but, apparently, just for the sake of art). It feeds on insects, which it catches with long, very long(two thirds the length of the chameleon!) sticky tongue. The tail is long and clingy. Chameleon tightens its tail around branches when moving, and while resting holds it spirally-rolled. He moves quietly sneaks up on its victims slowly moving on jointed legs. The toes also are adapted for gripping branches.
I watched the chameleon in the terrarium: moves like a robot. The chameleons eyes can move in any direction and not-synchronized: each looks to his side. Often the body of this lizard, and especially the head is decorated with ridges and outgrowths of the most bizarre that complementing his appearance, make the chameleon look very much as a kind of alien.
Enough biological descriptions,it is time to learn how to draw a chameleon.
Contents
- 1 Chameleon drawing tutorial -1
- 2 Chameleon drawing step by step tutorial 2
- 3 Chameleon drawing – lesson 3
Chameleon drawing tutorial -1
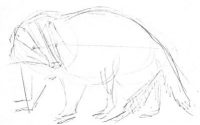
Let’s start with the markup of the body, first in pencil.

Making sure the proportions are correct, and start drawing a marker. Back as an arc, abdomen toned.

The front paws look just like the hinges. Hands like claws. The hind legs also bent at an angle.

The head is large and with some sharp excrescence on the neck (I wonder – for beauty or for protection?) Mouth like a slit, and round eye. 
Spiral tail will complete the look of the chameleon. Our chameleon is on the twig.Note that we need to honestly draw a branch from one edge of the sheet to the other. You can not pick a support under his feet and draw as if it comes from nowhere to nowhere.

The first Chameleon was oriented with head to the left. In this position, easy to draw animals. But we have to learn how to draw a chameleon oriented so that the head on the right.
Chameleon drawing step by step tutorial 2


And here is the second Chameleon picture:

Obviously, we have learned how to draw only the outline. And as you come up with the coloring of a Chameleon – this amateur to change the color – it depends on your imagination.
Chameleon drawing – lesson 3
Here is a sample from the Internet and drawing.

Step by step it would be this way:
1.Pencil sketch

2. Oval body

3.Head with a strange outgrowth

5.Skinny front legs

6. And finally – all the Chameleon entirely

By the way, I learned how to draw a chameleon so well that I prepared you a gallery of chameleon coloring pages. Enjoy them for yourself.


