How to make a paper bag love robot
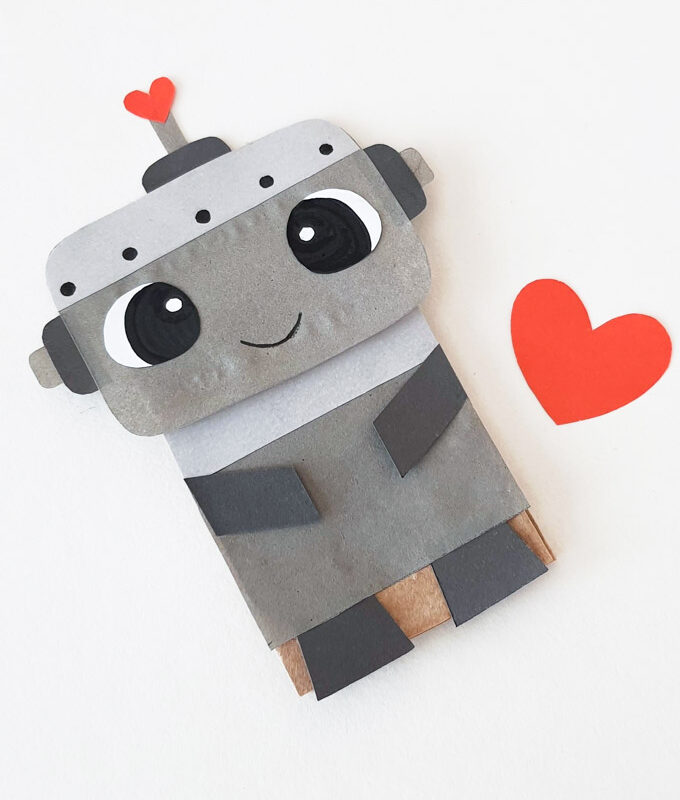
How to make a paper bag love robot
What do you need:
- Paper bags
- Craft paper in different colors
- Black marker or Sharpie
- Scissors
- Glue
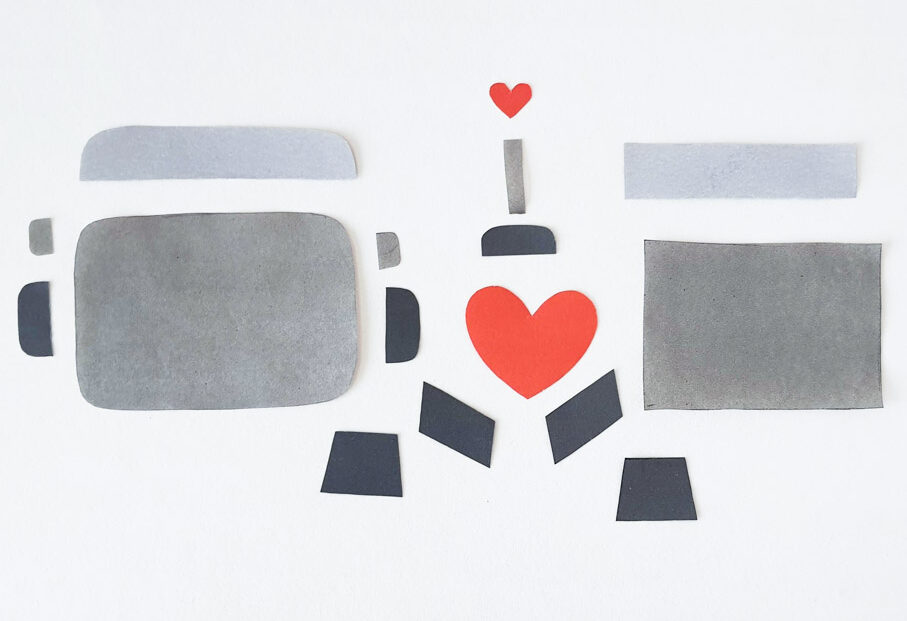
Step 1
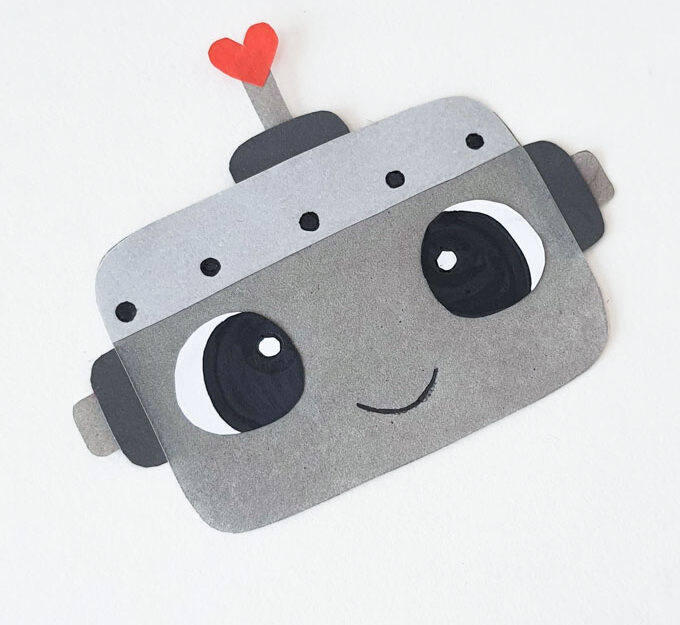
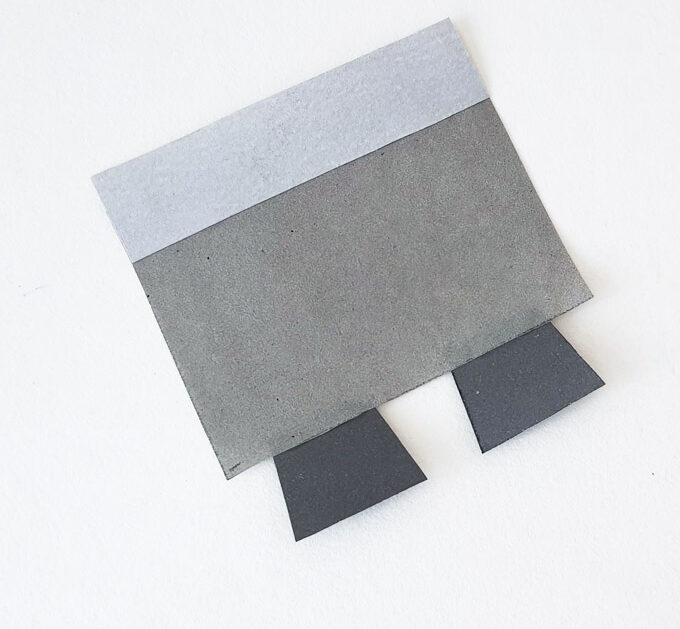
Cut out parts of the paper bag love robot craft from craft paper. We’ve used three different shades of gray here – the darkest for the inner ‘ears’, antenna base, arms and legs, a medium shade for the outer ‘ears’, antenna, head and body, as well as the lightest shade for the stripes. The hearts are in red, but you can use pink too. Cut out the pieces as shown in the image.
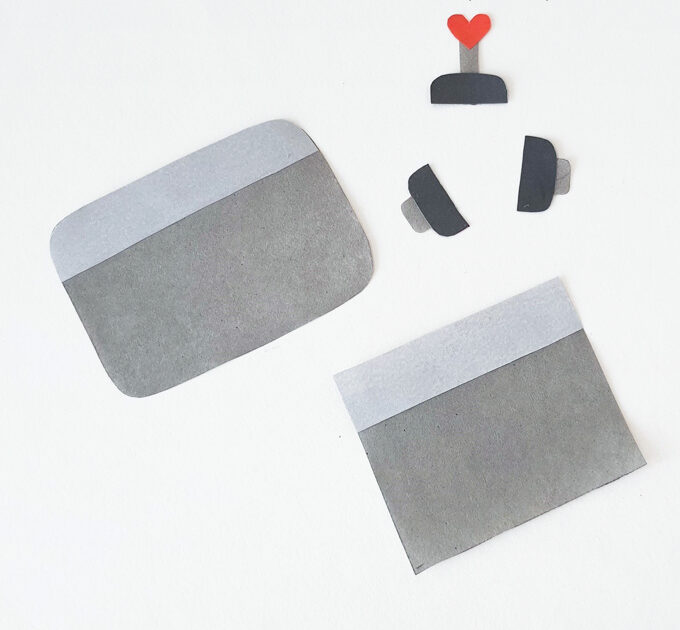
Step 2
Attach the outer ear to the inner ear by gluing the smaller nuts to the larger ones. Fix the stick of the antenna on its base, and then glue the little heart on top. Stick the light colored stripes on top of the head and body parts, making sure to align the top edges correctly. Be sure to use the stripe with the curved corners for the head and the sharp corners for the body.
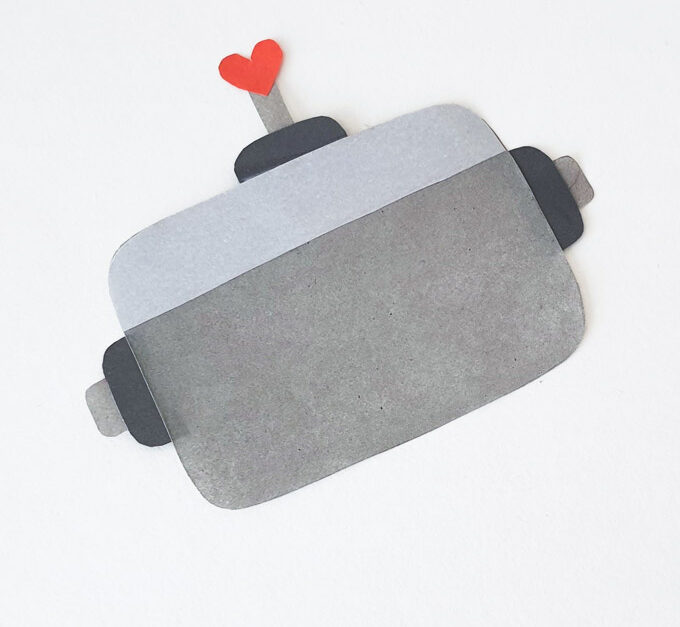
Step 3
Attach the ‘ears’ on either side of the head, making sure they’re in one straight line – you don’t want a robot with lopsided ears! Use the stripe as a guide when applying glue. Stick the assembled antenna on top of the head.
Step 4
tick two large white circles on the head, where the eyes should be. Now use your black marker to draw pupils and fill it in. Add some details on the top stripe, to make it look like the head of our paper bag love robot craft is screwed on tight! Don’t forget a cute smile!
Step 5
Stick the legs of the paper bag love robot craft to the bottom of the body.
Step 6
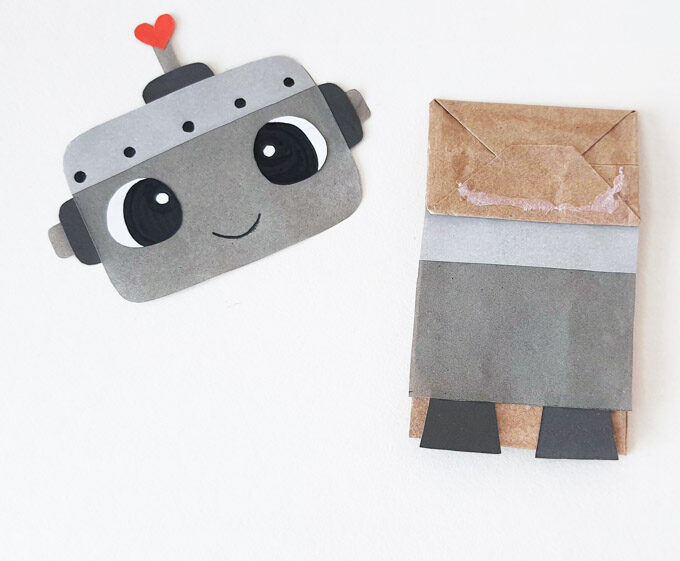
Take out the paper bag and get the assembled head and body parts. urn the paper bag so that the folded flap is facing you. Now apply glue over the part that lies below the flap. Stick the body of the paper bag love robot craft here.
Step 7
Apply glue on the flap now. Stick the head of the robot here. Stick the arms of the robot on the body, so they face inwards. Be careful to apply glue only on the edges – you want the ends of the arms free.

How to make a wall candle holder from cement

How to make a clay ring dish

How to make a felt cactus bookmark

How to make a candle in cement

How to make an alien spaceship with colored paper
